- Sinch Community
- More topics
- Engage Classic
- Chatbot
- Add buttons to your flow
- Subscribe to RSS Feed
- Mark as New
- Mark as Read
- Bookmark
- Subscribe
- Printer Friendly Page
- Report Inappropriate Content
Buttons are handy for suggesting several options to your customers. The Buttons step consists in a message supplemented with clickable buttons.
🎥You prefer to watch a quick hands-on tutorial? Check out our new bot builder video tutorial!
There are 3 types of buttons:
- Go-to: button that leads to another block on the canvas.
- URL: button that is given a URL link and opens it when clicked.
- Call: button that will initiate a call.
Buttons are restricted depending on the channel that you are using. Therefore, make sure you know about channel limitations on buttons before setting them up.
To add buttons to your chatbot:
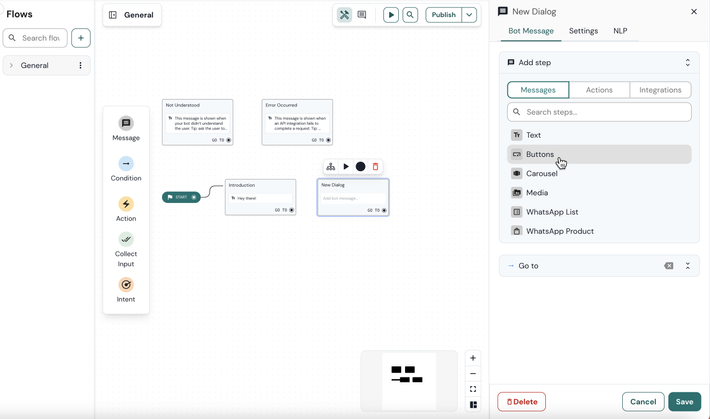
- Inside your block, click on Add step.
- Choose Buttons.
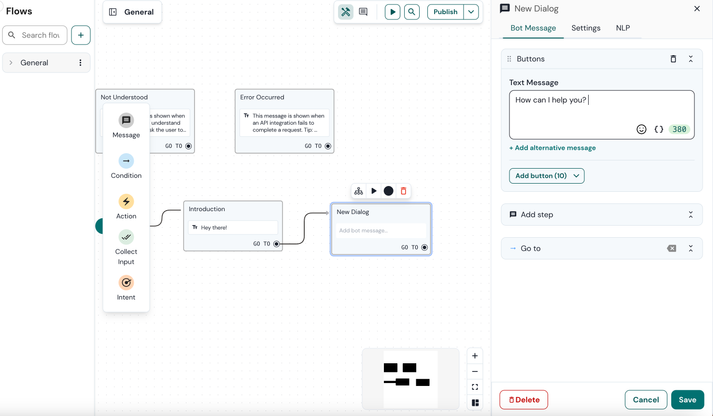
3. Write a text message.
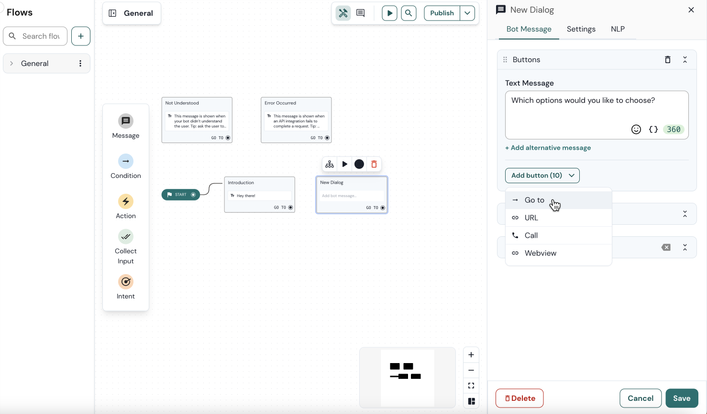
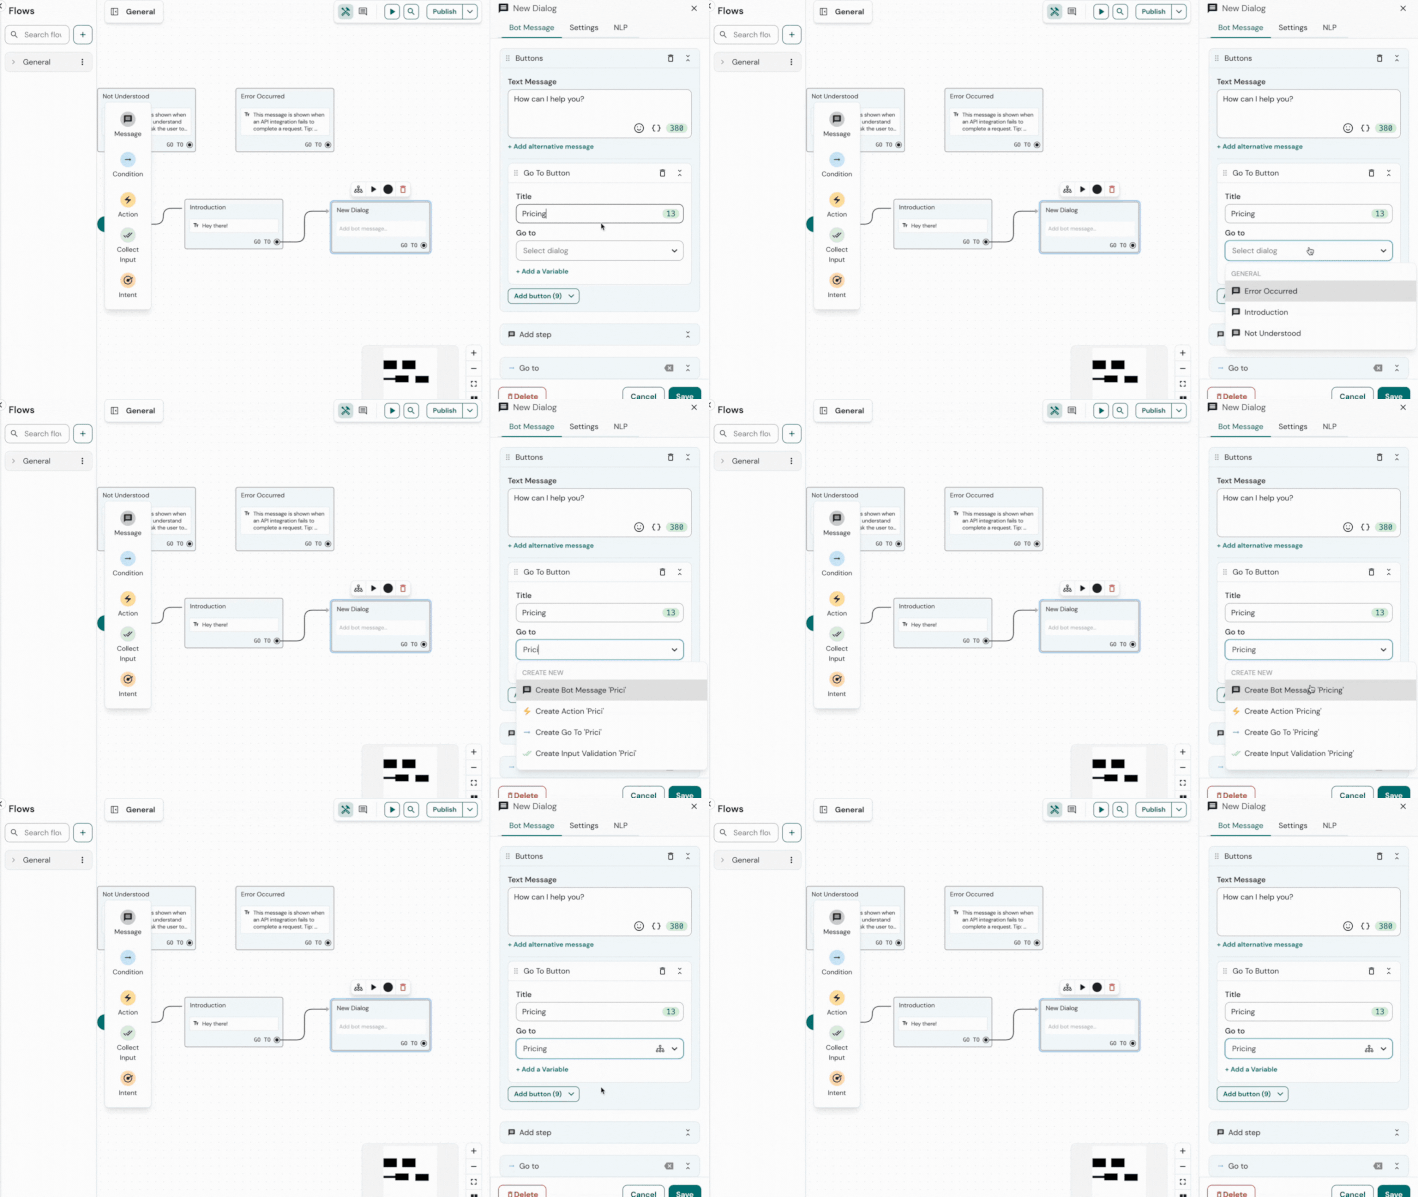
4. In this example, we'll include two buttons: one Go-to button and one URL button. First, add the Go-to button.
5. Under the Title field, provide a name for the button. In this example, we will use "Pricing" as the name, as this button will lead to a block that explains the pricing at the gym.
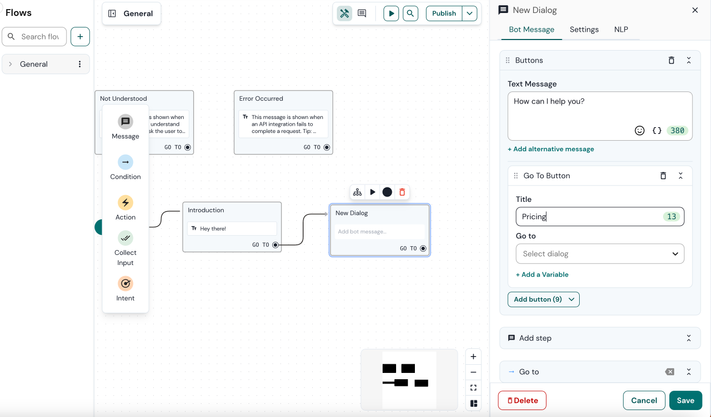
6. Under the Go-to section, we will create a new block. This block will be triggered when users click the button, redirecting them to a specific block. You can create this next block directly within the text field, begin typing the name and then select the desired block type.
7. Follow the same steps to add a URL button. Name the button "Opening hours" and enter the link (https://www.sinch.com/) that the button should open.
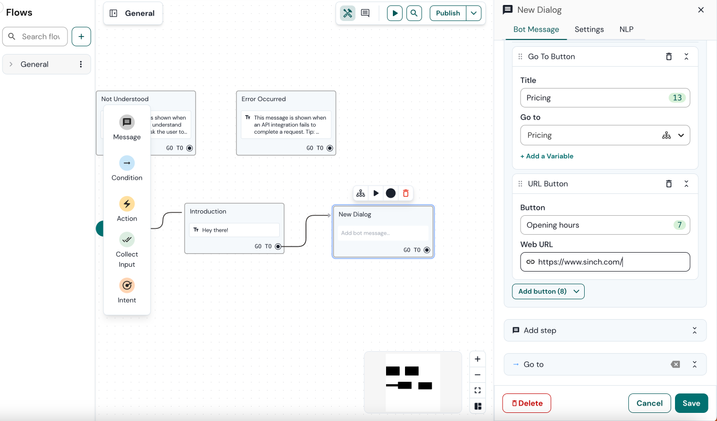
8. Click Save.

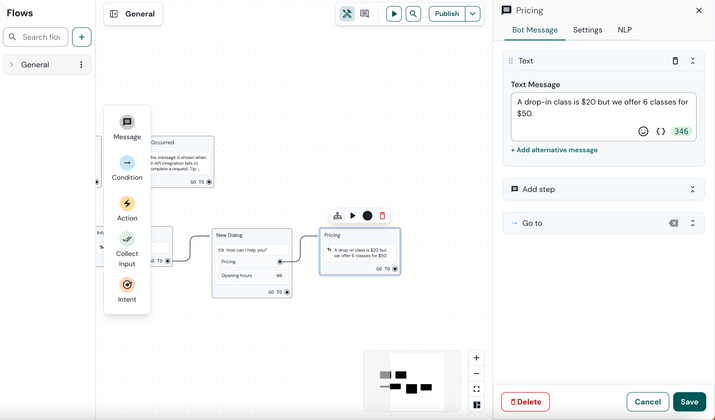
9. Add a bot message when the customer clicks on the first message (called "Pricing" in this example):
- Open the ‘Pricing’ block that you already created by clicking on it.
- In the Text message field, enter the text for the bot’s response. In this example, prices are given to the customer. Do not forget to save your block to save the changes.
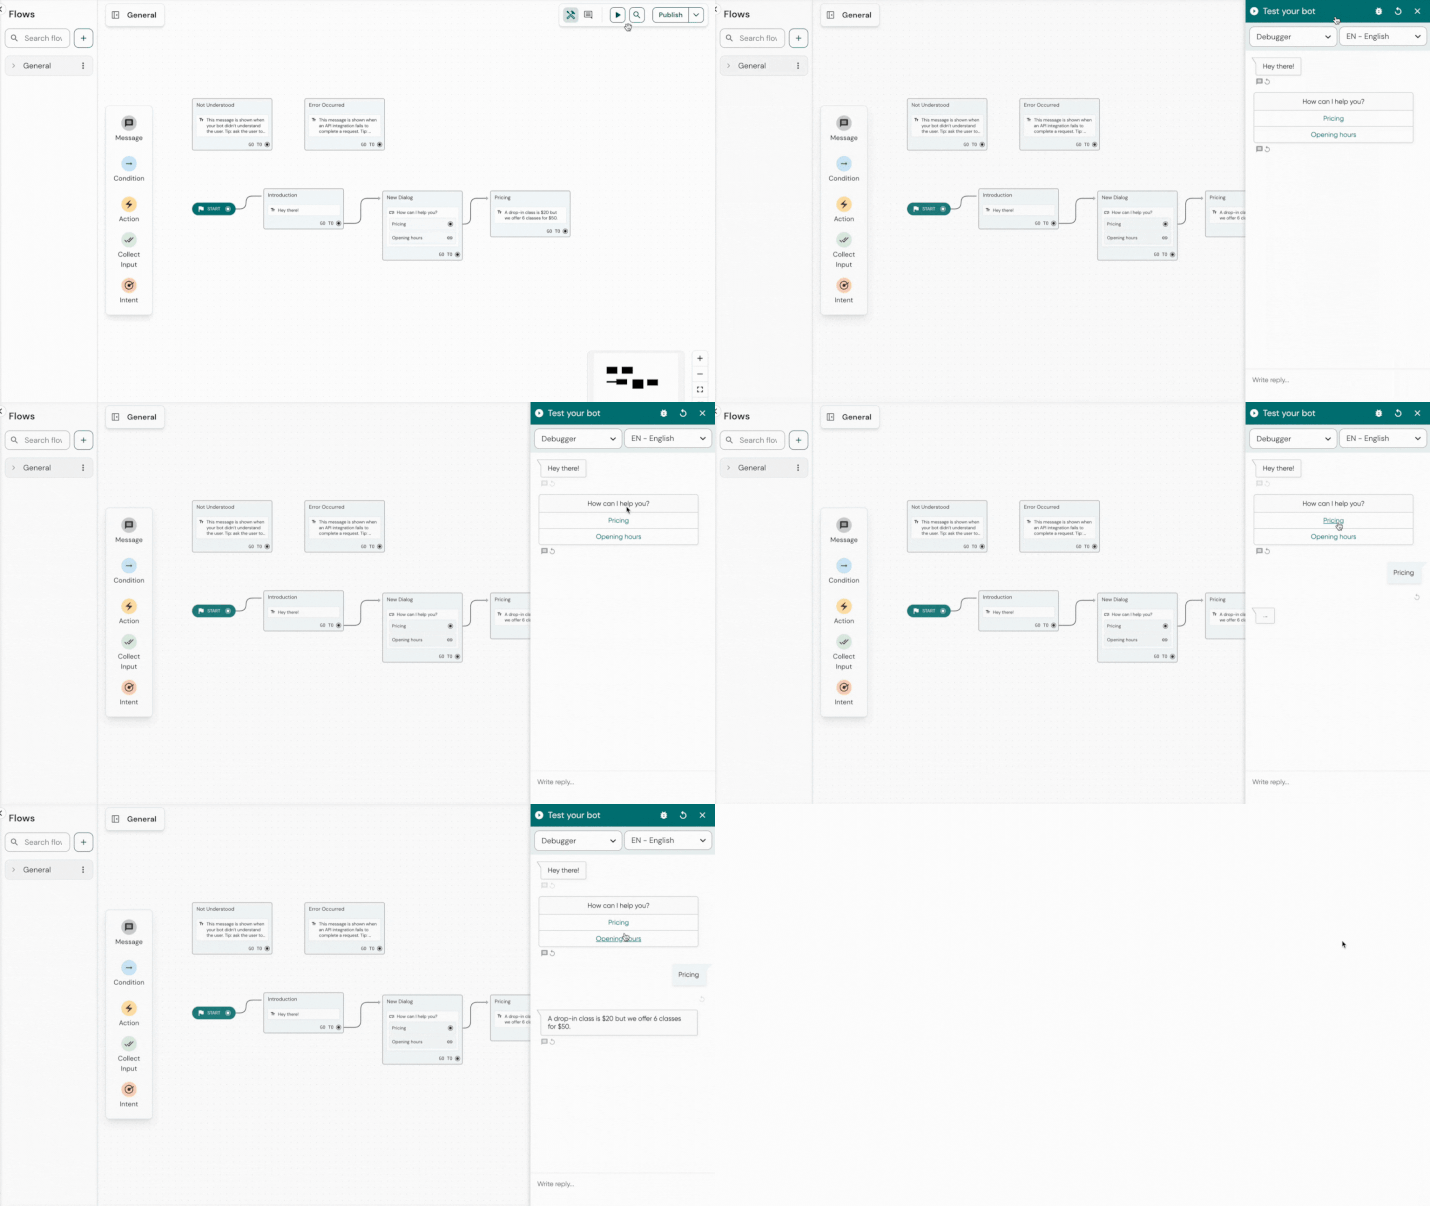
10. It's time to test your bot! Click the Play button and see the result.
See also:
- Mark as New
- Bookmark
- Subscribe
- Mute
- Subscribe to RSS Feed
- Permalink
- Report Inappropriate Content